How to Remove Wallpaper: A Simple Guide for Beginners

The removal of wallpaper can appear like a daunting job, but it’s actually achievable with a bit of patience. If you’re renovating your walls or planning the application of a new coating of paint understanding the proper method makes an enormous difference. There are many ways to go about it which means you can pick the one that is most suitable to your home’s walls. Here’s a step-by-step guide to assist you in the process.
Learn more: 12 Best Driveway Gate Ideas perfect for every home
Why Removing Wallpaper Can Be Tricky
It’s not as simple as pulling it off. Most wallpapers are held in place by glue, and it’s important to make use of the appropriate techniques and tools to prevent damaging your walls. Don’t be concerned, whether you’re dealing with peelable vinyl wallpaper, vinyl wallpaper, or simply stubborn old paper, there’s an solution.
Steamer Method
Ideal for: Sturdy wallpapers or wallpaper that is difficult to remove.
What You’ll Need:
- Wallpaper Steamer A wallpaper steamer an apparatus designed to steam and release the adhesive that is holding the wallpaper.
- Putty Knife: A flat device that is used to scrape away the wallpaper after it has been steam-cooked.
- Sponge: for cleaning the wall after wallpaper has been removed.
How to Do It:
Get the Steamer ready
Start by fixing the steamer plate onto the steamer that you use for wallpaper. Once the plate is installed then fill the reservoir of the steamer with water and ensure that it does not exceed the maximum fill line. Then plug the steamer into the socket and let it warm up. It’s ready when steam begins to flow, usually within 5-10 minutes.
Steam Wallpaper
Set the steamer plate on the wallpaper in a small area. Keep the plate in place for approximately 15 minutes. The steam softens the glue which is used to hold the wallpaper. Be cautious not to keep the wallpaper for too long in one location, as it could cause damage to the wall.
Learn more: Swimming Pool Design Ideas You Want to Swim Right Now
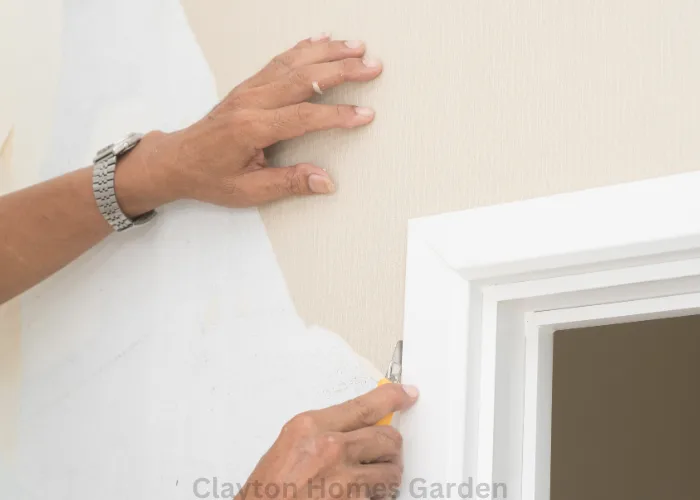
Peel Off
After about 15 minutes of steaming, unplug the steamer, and then quickly make use of your knife with a putty blade to scrape the wallpaper. Begin at near the corners of the wallpaper and gently lift it away from the wall. The wallpaper should fall off quickly if the steam sufficient time to disintegrate the adhesive. Repeat the process of scraping and steaming small pieces at each time.
Clean the Wall
After the wallpaper is removed completely There may be remnants of adhesive in the walls. Re-steam the areas and employ a putty knife scrape away any glue left behind. Then, clean the walls with a sponge damp to get rid of any glue that has remained.
Water and Vinegar or Fabric Softener Method
Ideal for: Peelable wallpaper, or If you prefer a natural chemical-free solution.
What You’ll Need:
- Spray Bottle to hold and apply your own wallpaper removal recipe.
- Water: The foundation of your solution.
- White Vinegar or Fabric Softener Both are employed to loosen the adhesive on wallpaper.
- Putty Knife: for scraping the wallpaper off after it’s removed.
How to Do It
Mix the solution Mix the Solution
Fill the spray bottle with water, one part, and one portion white vinegar, or mix three components of water per fabric softener. Shake the bottle until it’s completely blended. The vinegar aids in dissolving the adhesive while the fabric softener aids in softening the wallpaper.
Apply the solution
Gently spray the solution on an area of wallpaper. It is important to make sure that the wallpaper is completely saturated since moisture can break bonds between glue and wallpaper. Let the solution soak in for around 10 minutes.
The Wallpaper Peel
When the wallpaper is completely soaked you can take your putty knife and begin gently stripping it away. Start with the edges, and gradually pull back away from your wall. If the wallpaper does not adhere it, you might require re-spraying it with the solution, and leave it for 15 to 20 minutes.
Liquid Wallpaper Remover
Ideal for: Vinyl wallpaper, or waterproof wallpaper for bathrooms.
What You’ll Need:
- Wallpaper Stripper is a liquid solution that dissolves wallpaper glue and aid in releasing the wallpaper.
- Putty Knife to scrape away the wallpaper once it’s loosen.
- Sponge: For cleaning the walls after wallpaper and glue are removed.
How to Do It
Apply the Stripper
Begin by spraying the wallpaper stripper in liquid form onto a small area of wallpaper. Make sure you apply the stripper evenly to the wallpaper. This technique is most effective on vinyl, or any other non-porous wallpapers typically found in kitchens and bathrooms.
Let the stripper’s liquid
liquid remain on the wallpaper for approximately five minutes. This allows it to penetrate the adhesive and paper which softens both.
Scrape It Off
After allowing the stripper to get started you can take your knife to gently remove the wallpaper off the wall. This liquid ought to have softened the wallpaper so that it can be easily removed.
Clean the Walls
Once the wallpaper has been removed, make use of a sponge that is damp to remove any remaining strips or adhesive. This ensures that the surface is clean and ready for painting or any wallpaper.
Gel Wallpaper Remover
Ideal for: If you require a solution which adheres to walls and is able to stay moist for a longer period of time and is ideal for large spaces.
What You’ll Need
- Gel-based Wallpaper Removal: A more dense solution that is able to stay in place for longer and allows you to take wallpaper off more efficiently.
- Tools for scoring wallpaper (Optional) Useful to make tiny holes in wallpaper, allowing the gel to be more effective and penetrate better.
- Putty Knife: To scrape off wallpaper once it’s loose.
How to Do It
Use the gel
Spread Gel wallpaper removal liberally on the wallpaper with either a sponge or brush. If you’re using a tool for scoring wallpapers use it to gently score the wallpaper prior to. Scoring helps the gel get into the adhesive and paper more easily, which makes the removal process quicker.
The gel should be allowed to rest for 15-30 minutes
The gel has a slower reaction than liquid removers, however it’s advantages include remaining moist for longer which is perfect to tackle large areas.
Scrape the wallpaper
Once you have waited for the gel to start working then use your cut-off knife gently to peel off the wallpaper from the wall. Gel should’ve loosen both the adhesive and paper and made it easier to get rid of.
Preparing the Room for Wallpaper Removal
Before you begin the process of taking wallpaper off ensure that you’re prepared to tackle the task. Here’s how you can prepare your area:
Guard your Floor Remove Wallpaper
Wallpaper removal can be messy work Therefore, you must protect your flooring from adhesive, water, as well as liquid removers, by using sheets of plastic old towels, drop cloths.
Clean the walls Clean the Walls
Remove any items that could hinder your work such as mirrors, pictures or shelves. Also, remove covers for light switches and electrical outlet covers to allow an easy access.
Be Safe
If you live in a house was constructed prior to 1978, it’s possible that the paint you use may be contaminated with lead. Lead paint can be hazardous particularly when disturbed therefore take precautions. Wear a respirator in order to avoid inhaling dust from lead and think about the use of an instrument to determine whether lead is present on your walls.