
Can You Paint Vinyl Cladding? A Comprehensive Guide for Homeowners in the USA
Are you wondering if vinyl cladding could be painted to refresh the outside of your house? While vinyl cladding is renowned for its low Maintenance and durability, it is also known for its durability. Over Time, its appearance may deteriorate or fade with Time. If you have the right tools, materials, and techniques available to paint vinyl cladding as professionals, you will guarantee an ongoing improvement in its appearance! In this tutorial, we’ll guide you through each step of painting vinyl cladding as an expert. We’ll guarantee durable outcomes!
Expert Introduction
Sherwin-Williams, one of the top paint manufacturers, says that vinyl can be described as a porous surface that requires specialized types of paint to achieve the best adhesion. It is suggested to use high-quality paints that are specifically designed for vinyl to get the best results. This article contains all the equipment and knowledge necessary to complete the task for you.
Why You Should Paint Your Vinyl Cladding, Benefits of Painting Vinyl Cladding
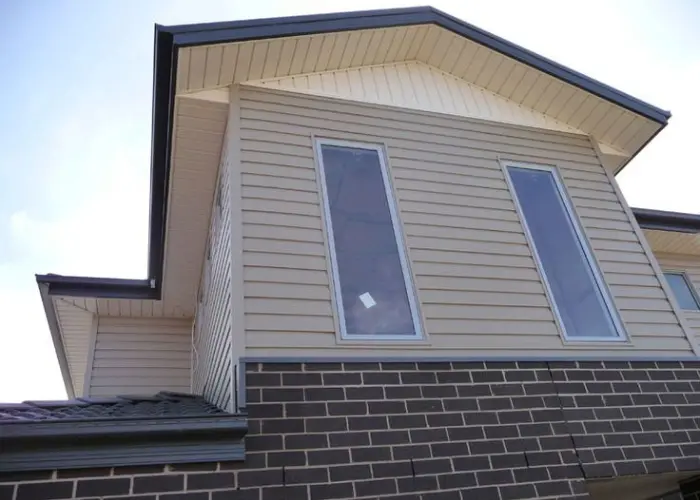
Vinyl cladding is an option for homeowners throughout the USA because of its weather-proofing, low maintenance requirements, and durability over Time. As Time passes, however, the appearance of it can become dull or faded, and painting your vinyl cladding could be beneficial. Here’s the reason why applying paint to your vinyl siding.
Improve Curb Appeal
Paint your home to bring it back to life instantly, enhancing the curb appeal and increasing its overall value.
Cost-effective
Painting can be an affordable alternative to replace old vinyl cladding rather than replacing it.
Protective Coating
The Best paint will provide an additional layer of shielding against weather elements, and help prevent any further damage as Time passes.
Correct Paint for Vinyl Cladding
Selecting the right paint is vital to ensure the painting process lasts. Here’s what to remember while making this important choice’s
Make sure to use a vinyl-specific paint: choose a paint that is specifically designed to stick well and not peel or crack over Time. This ensures that the color is properly adhered to the coat, which isn’t peeling or cracking over Time.
Outside Paint: When you choose exterior paint that is intended for outdoor use, ensure that the paint is able to withstand the harsh weather elements, exposure to UV, and temperature fluctuations typical of the USA.
Types of Finishes for Vinyl Cladding
Satin or semi-gloss finishes are ideal for vinyl cladding because they can be easily cleaned and maintained, in contrast to glossy finishes that are prone to catching dirt and displaying flaws, and matte finishes that aren’t durable enough.
Step-by-Step Guide to Painting Vinyl Cladding (H2) Step 1: Clean and Prep Surface
The proper preparation of the surface is crucial for a successful painting job. Here’s how to prepare for cladding made of vinyl:
Pressure Wash
To get the most efficient cleaning of vinyl cladding, use the pressure washer. Be sure to get into every crevice and groove in which dirt could collect for the best outcomes.
Scrub Sturdy Spots
For trying to remove stubborn spots of mildew, or stain spots, mix water with mild detergent to get the best results. A soft brush must also be used to get the best results, without damaging the surface.
Dry the Surface
Prior to starting step two, allow your cladding to completely dry to ensure an adequate adhesion of paint to the surface. This is essential to ensure an efficient painting job.
Step Two – Prime the Surface
It’s not always required, but it can aid in adhesion and also help cover up any stain. If you’re painting vinyl for the very first Time or you’re changing colors dramatically, using a primer made specifically for vinyl is strongly recommended.
Select a primer that is safe for vinyl, such as Zinsser, which provides primers specifically to increase the adhesive of paint for vinyl-based surfaces. improving the longevity of the surface and also adhesion over Time. Apply Primer: Using an air-tight sprayer, roller or brush apply the primer in an even layer. Make sure that it is apply of each square inch and let it fully dry prior to moving on to the second step.
First Coat of Paint
After priming, begin painting your cladding. Here’s how:
Utilization of a Paint Sprayer when you need to cover large areas in a short time and with consistency, the use of an airless paint sprayer is the most effective tool to ensure a consistent and smooth coverage, without lines or unevenness.
Concentrate on working in small Sections: It’s essential to achieve an even finish, so you only tackle a small area at a time, so that the paint does not dry prior to having completed all the region. If you follow this method, your best chance will be that you will get an even result.
The drying time should be allowed for the initial coat to dry completely before beginning the second coat. Follow the guidelines of the manufacturer regarding drying times.
Step 4 – Apply Second Coat of Paint
Apply another coat of paint to ensure the best, long-lasting result.
- Examine for gaps or thin spots: Prior to starting to apply the second coat, check the first coat to determine areas that need more coverage.
- Even Application: Applying the same method that you applied one coat of paint, apply this second coat in an even manner.
- Make sure to allow for drying time: Give a minimum of 24 hours of drying time after applying another coat prior to exposure to the elements or weather.
- Expert Advice and Tips for Painting Vinyl Cladding on H2 Building Systems. Recommendations by Industry Professionals.
- Avoid dark colors. Dark colors absorb heat and can lead to shrinkage or warping in vinyl panels for cladding. Lighter shades will prevent this problem and will ensure durability for many years of enjoyment.
- Regular Maintenance to keep that vinyl looking new, clean it frequently, and polish any areas of paint as required.
- Don’t skip Primer: If you are unsure regarding whether or not to use a primer, take a step of caution and utilize one. It can make your paint stick better and give an appearance that is more professional.
Long-Term Results of Painted Vinyl Cladding.
Research suggests that paint applied professionally on vinyl cladding could last between 7 and 10 years if properly installed, and based on the weather conditions, the quality of the paint used, and maintenance techniques. A study by Sherwin-Williams showed that surfaces painted professionally retained aesthetic appeal and weather resistance more than surfaces that were not painted.
Conclusion
Is Painting Vinyl Cladding Worth It? In the end, the process of painting vinyl panels may be a cost-effective and effective option to refresh the outside of your house and safeguard it from the environmental elements. If you follow the correct procedures using top-quality materials and keeping its appearance for years ahead, painting your vinyl cladding can extend its life significantly. If you’ve learned the steps to paint vinyl cladding, why don’t you begin? If DIY projects aren’t appealing to you, or you need professional help to get the best outcomes, contact Pro Works Painting’s vinyl surface specialists to get expert advice and guidance! Call them to schedule a free consultation to assist you in creating beautiful, long-lasting surfaces for the outside of your house!