
Fence Screening Ideas That’ll Make Privacy Solutions for Every Budget

You know that feeling when you step into your backyard and realize your neighbor’s recycling bins are basically the main view?
Or when you’re trying to enjoy morning coffee and there’s a direct sightline to the house next door?
I’ve been there. And honestly, privacy shouldn’t feel like a luxury when you’re in your own yard.
The good news? There are dozens of fence screening ideas that don’t require ripping out your existing fence or spending thousands on a contractor. Some of these I’ve tried myself. Others came from neighbors who actually got it right.
Let’s fix that awkward backyard situation.
Learn more: Gothic Architecture Elements Design That Transform Any Home
Why Most Fence Screening Projects Fail (And How to Avoid It)
Here’s what nobody tells you upfront: most people pick a screening solution based purely on looks. Then six months later, it’s sagging, dead, or falling apart.
I learned this the hard way with bamboo rolls that looked perfect in spring and turned into a sad brown mess by August.
Before you choose anything, ask yourself three questions:
How much sun does that fence get? Full afternoon sun will cook certain plants. Zero sun makes others struggle.
What’s your actual goal? Blocking a specific window? Hiding trash cans? Creating full perimeter privacy? The answer changes everything.
How much maintenance are you honestly going to do? Be real with yourself here.
Now let’s get into what actually works.
1. Climbing Vines (The Set-It-and-Almost-Forget-It Option)

This was my first move, and if you pick the right vine, it’s shockingly low-effort.
Clematis worked beautifully on my east-facing fence. Massive purple blooms in late spring, decent coverage, zero drama. I water it maybe twice a month in summer.
Honeysuckle is tougher and spreads faster — but watch it. My friend’s honeysuckle took over her entire fence line in two years. She loves it. Her neighbor… not so much.
Star jasmine is the move if you’re in a warmer zone (7-10). Smells incredible, evergreen, handles heat like a champ.
One thing I wish I’d known earlier: use galvanized wire or a trellis system from day one. Trying to add support after the vine’s already established is a nightmare.
2. Vertical Garden Panels (For Renters and Commitment-Phobes)

If you rent or you’re not sure what you want long-term, these are perfect.
I’m talking about those modular planter boxes that hang directly on fence posts. You can find them at any garden center — usually 30-60 per panel.
Fill them with trailing plants like pothos, ivy, or even kitchen herbs if you want to function with your privacy.
The best part? You can take them with you when you move. Or rearrange them. Or just… change your mind without ripping anything out.
They won’t give you 100% coverage, but combined with a few taller plants at the base, they work surprisingly well.
3. Bamboo Screening (When Done Right)

Okay, so I trashed bamboo earlier — but that was the cheap rolled kind that disintegrates.
Real bamboo screening is different. I’m talking about quality slat-style panels or live clumping bamboo planted in a controlled bed.
If you go the live route, make absolutely sure you’re buying clumping bamboo, not running bamboo. Running bamboo will invade your neighbor’s yard, crack your patio, and generally become your full-time job.
Clumping varieties like Bambusa multiplex stay put and create a gorgeous, dense screen that moves beautifully in the wind.
One downside: it’s not cheap. Expect 100-200 per mature plant, and you’ll need several for real coverage.
4. Lattice Toppers (The Instant Height Hack)
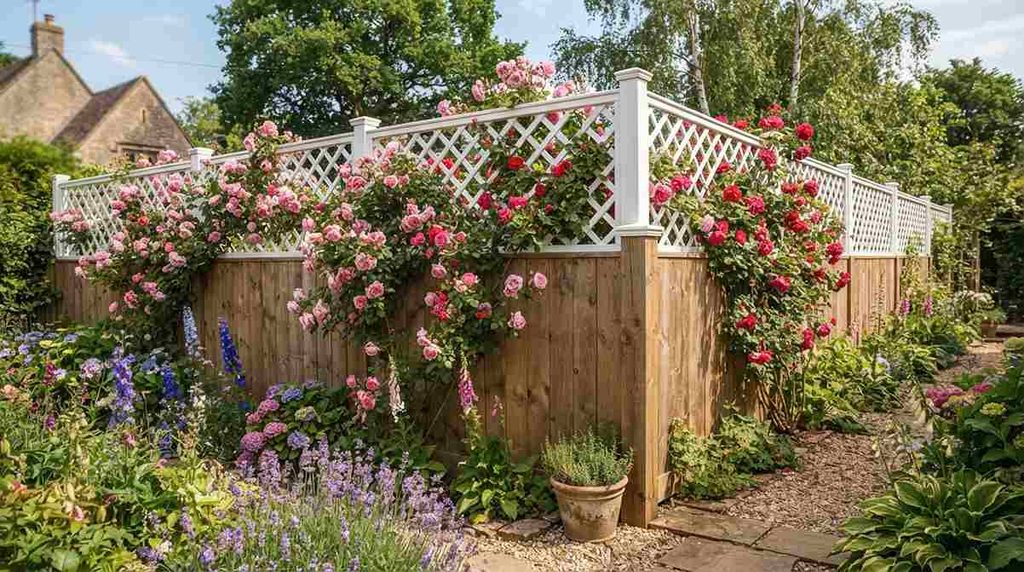
If your fence is just a little too short, lattice toppers are the fastest fix.
You can buy pre-made sections at any home improvement store. Attach them to your existing fence posts, and boom — instant extra 1-2 feet of height.
Then you’ve got two options:
- Leave it as-is for a semi-private, decorative look
- Train climbing plants up it for full coverage
I went with the second option and used climbing roses. Took about one full season to fill in, but now it’s basically a living wall.
Pro tip: paint or stain the lattice before you install it. Trying to do it afterward with plants growing through is… not fun.
5. Outdoor Curtains

I was skeptical about this one until I saw it at a friend’s place.
She hung outdoor curtains on a simple rod system along her patio fence. When she wants privacy, she pulls them closed. When she wants airflow, they’re open.
The key is getting actual outdoor-rated fabric — the kind that’s mildew-resistant and UV-protected. Indoor curtains will fade and rot within a season.
This works especially well if you’ve got a covered patio or pergola where you can mount the rod overhead.
Not a permanent solution, but way more flexible than anything else on this list.
6. Living Walls

These are basically vertical gardens on steroids.
You install a wall-mounted grid system, fill it with pockets of soil, and plant everything from ferns to succulents to trailing flowers.
Does it look amazing? Absolutely.
Is it high-maintenance? Also yes.
You’ll need to water more frequently (sometimes daily in summer), fertilize regularly, and replace plants that don’t make it.
But if you’ve got the time and you want something genuinely unique, this is the move. I’ve seen some that double as herb gardens — basil, thyme, oregano all growing vertically. Functional and beautiful.
7. Corrugated Metal Panels (Modern Industrial Look)

This one’s trending hard right now, especially in urban backyards.
Corrugated metal or steel panels give you instant privacy, zero maintenance, and a super modern aesthetic.
You can leave them natural for that raw industrial vibe, or paint them in dark charcoal, black, or even a bold color if you’re feeling it.
Downside: they get hot in direct sun. And if you’re in a windy area, make sure they’re anchored properly or you’ll have a percussion concert every time the weather kicks up.
Cost varies wildly depending on material quality, but expect 15-40 per linear foot installed.
8. Reed Fencing (The Budget-Friendly Natural Option)
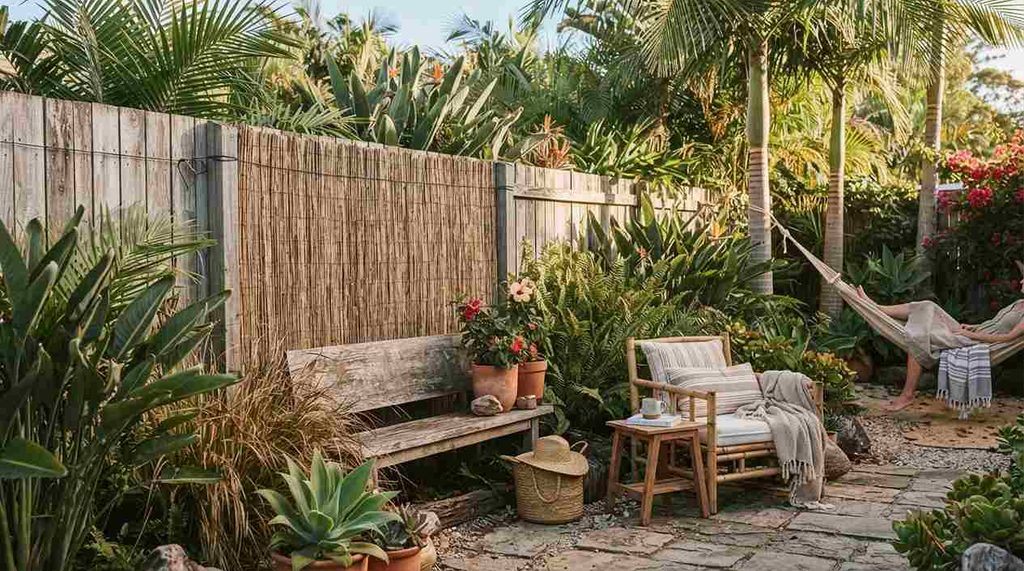
Reed fencing rolls are shockingly cheap — I’m talking 30-50 for an 8-foot section.
They’re made from natural reed or willow, and you just unroll them and attach them to your existing fence with zip ties or wire.
The look is casual, beachy, almost tropical depending on your setup.
The catch? They don’t last forever. You’ll get 2-4 years depending on your climate. But for the price, that’s honestly fine. Just plan to replace them eventually.
I used these as a temporary solution while my climbing plants filled in, and they worked perfectly for that.
9. Planter Boxes with Tall Grasses

If you don’t want to attach anything to your fence, go vertical with tall planters.
Fill them with ornamental grasses like maiden grass, feather reed grass, or fountain grass. These grow 4-6 feet tall, create movement, and provide serious screening.
Space the planters every few feet along your fence line, and you’ve got a living privacy barrier that’s completely movable.
This approach also works great if you’re dealing with a shared fence and you don’t want to modify something that’s technically not yours.
10. Hedge Planters (The Classic That Actually Works)
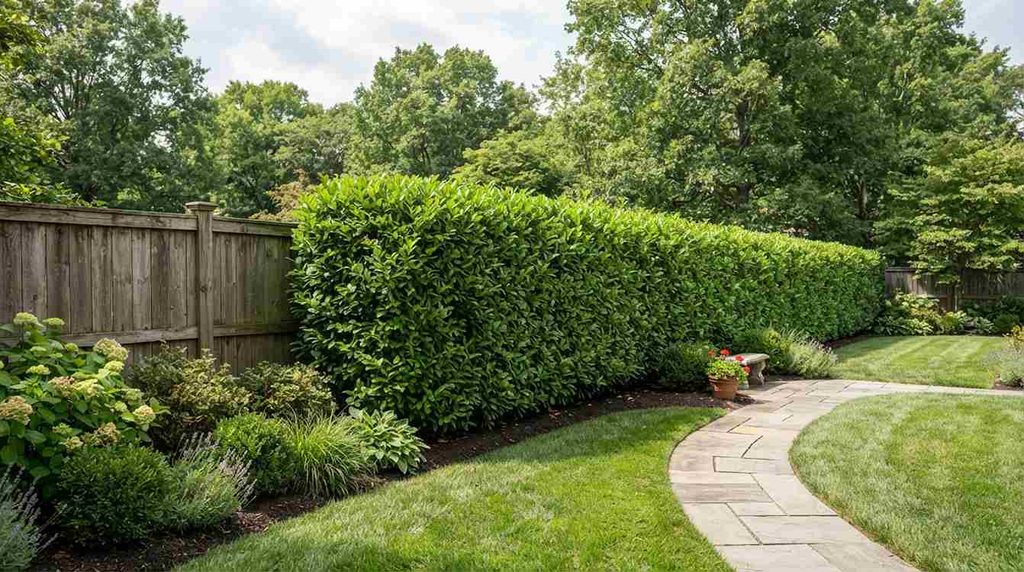
Okay, this one’s not revolutionary — but it works.
Plant a row of shrubs along your fence line. Boxwood, privet, laurel, or arborvitae depending on your zone and how much sun you’ve got.
Yes, it takes time. Yes, you’ll need to trim them. But once they’re established, you’ve got permanent, evergreen privacy that looks intentional and polished.
I went with skip laurel on my north-facing fence because it tolerates shade and grows relatively fast. Three years in, it’s dense, green year-round, and requires one trim per year.
Learn more: Laundry Folding Table Ideas That Actually Work
11. Reclaimed Wood Slat Extensions

If you’re even slightly handy, this one’s a showstopper.
Buy reclaimed wood (or just use untreated cedar), cut it into vertical slats, and mount them horizontally along your fence with a few inches of spacing between each slat.
You get privacy, airflow, and a custom look that feels way more expensive than it actually is.
I’ve seen people stain them dark walnut, leave them natural, or even paint them white for a modern farmhouse vibe.
Cost depends on your wood source, but DIY keeps it under $200 for a decent section.
12. Mirror Panels (The Optical Illusion Trick)

This one’s a bit unconventional, but I’ve seen it work beautifully in small yards.
Mount outdoor-safe mirror panels on sections of your fence. It creates the illusion of depth, reflects light, and makes your space feel bigger.
You’re not getting privacy from the mirror itself, obviously — but combine it with strategically placed tall planters or a vine-covered trellis nearby, and it becomes part of a larger screening strategy that also happens to look incredible.
Use acrylic mirrors, not glass. Safer, lighter, and weather-resistant.
What Actually Matters When You’re Choosing
Look, you can overthink this. I did.
But after trying five different screening methods across three houses, here’s what I’ve learned matters most:
Maintenance reality check. Don’t pick something that requires weekly care if you’re barely home. Be honest about your bandwidth.
Your zone and sun exposure. A solution that works in Oregon might completely fail in Arizona. Check what actually thrives in your specific conditions.
Neighborly vibes. If you share a fence, a quick heads-up goes a long way. I’ve avoided awkward conversations just by mentioning my plans ahead of time.
Mixing methods works better than one solution. I’ve got climbing vines on one section, a row of grasses on another, and lattice toppers where I need quick height. It looks intentional, not matchy-matchy.
Final Thoughts
If I were starting from scratch today, knowing what I know now?
I’d go with a combination of climbing vines on a sturdy trellis system for the long-term backbone, tall ornamental grasses in planters for movable screening, and maybe one section of corrugated metal just for visual interest.
That gives you evergreen coverage, flexibility, and a mix of textures that actually looks designed — not like you panic-bought whatever was on sale.
Your backyard should feel like yours. Not like a stage where the neighbors have front-row seats.