
Complete Aloe Vera Plant Care Guide: Growing, Harvesting & Benefits
The summer before, I burned my fingers while grabbing an open flame without thinking. Instead of rushing to the cabinet for medicine, I walked to my window in the kitchen and cut off a leaf of aloe and squeezed that cool, refreshing gel. The relief was immediate. It hit me that this tiny green plant, sitting by my window, had saved me a trip to the pharmacy and could have helped heal my burn quicker than anything else I could have purchased.
I first started growing aloe vera around eight years ago, when a neighbor gave me a small plant that she’d grown from hers. In those days I had no idea the best way to care for a cactus or even how to harvest healing gel from an indoor plant. Nowadays, I have six vibrant aloe plants in my home. I’ve also donated a number of them to my family and friends.
The thing I love about the aloe plant is it wishes to be successful. Even though I’ve been able to kill anything that I could, from fiddle-leaf figs all the way to the supposedly “unkillable” snake plants, my aloe has graciously accepted every error I’ve made. I’ve not watered it for months and transferred it from my home as furniture, and accidentally threw it over. It keeps expanding, multiplying, and producing the healing gel every time I require it.
If you’ve considered making the switch to houseplants but are scared, or are looking for something that has an important purpose other than looking pretty, aloe vera could be the solution. I’m going to share all the things I’ve learned from years of experimentation and trial, along with some advice from real experts who are more knowledgeable than I am.
Why Aloe Vera Works So Well in American Homes
Aloe vera (Aloe barbadensis miller) originated in the Arabian Peninsula, but it’s adapting to American homes much better than many natives. It has been used to treat ailments for over 4,000 years; however, it took off in the natural health movement in the 1970s.
Aloe isn’t just its ability to help heal cuts and burns, even though that’s amazing. It’s the fact that it appears to be made to be a perfect fit for people who are busy. The leaves are thick and fleshy. hold water for weeks so you can travel without stressing. The plant prefers to dry between waterings, so if you forget to water, this is much better than not paying attention.
Our typical indoor settings that are dry, with moderate temperatures of 70 degrees and bright windows—are known to be precisely what aloe vera is a fan of. While other plants suffer in low humidity or battle with central heating, aloe vera thrives.
Dr. Sarah Martinez, who studies plants at UC Davis, put it perfectly when I spoke to her about it: “Aloe vera works in American homes because we’ve accidentally created the perfect environment for it. The plant stores water in its leaves and contains over 75 active healing compounds, and the gel you harvest at home is actually more potent than most commercial products because it hasn’t been diluted or preserved.”
The data backs this assertion as well. It was found that the National Gardening Association found that 68 percent of American households that have houseplants own at the very least one aloe vera plant, and it is the third most sought-after indoor plant, after snake plants and pothos. There’s a reason behind that popularity, and it’s actually working.
Real People, Real Results
Jennifer was convinced that she had a black thumb up to the year 2003. “I’d killed every plant I’d ever tried to grow,” she said to me. “But my neighbor kept insisting I try aloe vera, saying it was impossible to kill.”
Today Jennifer’s plant has yielded twelve babies, which she has given to family and friends. The test really came in the month of December when her eight-year-old daughter’s hand burned on the cookie sheet. “Instead of panicking like I usually do, I calmly walked to the windowsill, cut off a piece of aloe, and within minutes Emma was feeling better. That moment changed how I think about plants.”
Jennifer estimates that she saves around $150 annually on moisturizers, burn gels and first aid kits. “When you consider that a single emergency room visit for a minor burn can cost $500-800 in Portland, having aloe at home just makes sense financially.”
Mike Rodriguez, Sarasota, Florida
Mike started to grow aloe vera when he was 72 in the course of recovering from a stroke. The occupational therapist recommended easy-care plants that could give him an energy boost without becoming too overwhelming.
Today, Mike is the owner of eight mature aloe plants and is the official plant person within his community of retirees. “I harvest gel for neighbors with arthritis pain, and we’ve started an informal plant-sharing network. It’s brought our whole community closer together.”
Mike’s experience demonstrates what I’ve observed too. Aloe vera transforms people into sharing types. The plants naturally have babies, which means you’ll have extras to share with others. It builds connections.
Detroit Urban Farming Initiative
On a grander scale, it’s been reported that the Detroit Urban Farming Initiative has given out over 500 aloe plants to residents in the area in 2022. Coordinator of the program Dana Williams told me they’ve observed a reduction of 40% in minor injury-related emergency department visits in households participating.
“Aloe vera costs about $10 to start but provides years of benefits,” Williams explained. “We’re essentially democratizing natural healthcare for families who might not otherwise have access.”
How to Actually Care for Aloe Vera Location
A lot of people contaminate aloe vera either by fussing over it too much or placing it in the incorrect place. After moving my aloe vera throughout my home for a long time, I’ve discovered the best places.
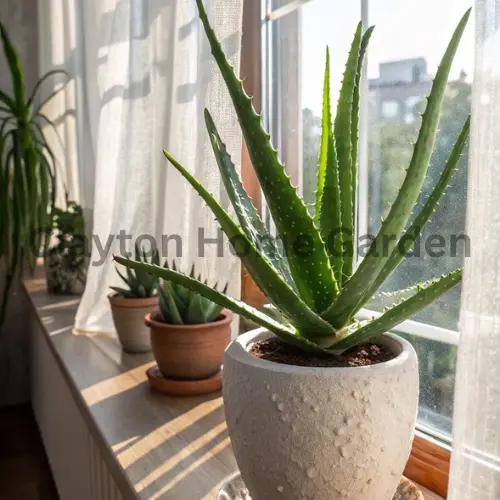
The best location is near an east- or south-facing window that receives light that is indirect but bright all day long for 6-8 hours. If you live in a region that has intense sunlight, such as Arizona, it is possible that you will require a filtering of sunlight from the afternoon with a curtain. In the northern states, you are able to place aloe right in the sunlit window without issues.
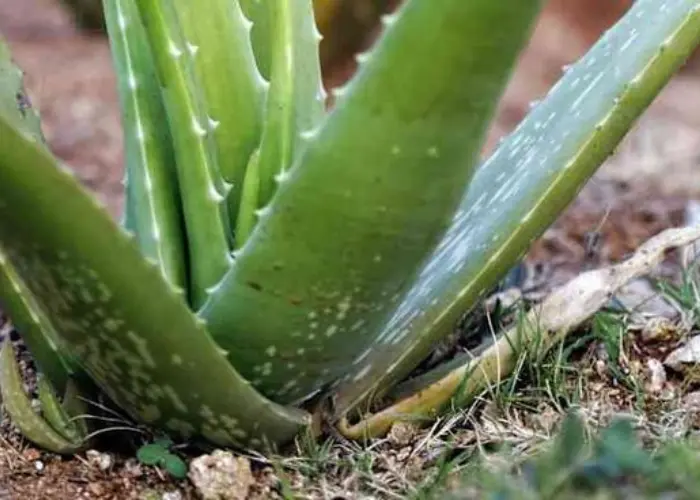
Temperature: Normal temperatures in the house (65-75°F) are ideal. Make sure to keep it away from heater ventilation, AC units, or windows that are drafty. I learned this the hard way after my first plant developed brown spots because it was too near a furnace during the winter.
Humidity: This is where aloe vera shines; it really prefers dry air that is prevalent in American homes. Although other plants require pebbles or humidifiers, aloe vera will be content with the humidity that your home naturally has.
Watering: The Make-or-Break Factor
This is the place where the majority of people end up killing the aloe plant. I definitely did this with my first plant.
It was my habit to hose down the aloe two times every week, thinking it required continuous water. Big mistake. The plant developed root rot in less than a month and then died regardless of my “loving care.”
The key is to water thoroughly, but not too often. Put your finger about 1-2 inches deep into the soil. If you feel it is dry and spongy, then you need to water. In most houses, this is every 2 to 3 weeks during summer and spring as well as every three to four weeks during the winter and fall seasons.
The quality of the water matters. Room temperature water is ideal. If you reside in a place that has high levels of chlorinated drinking water (like Los Angeles or Chicago), allow tap water to sit for 24 hours or make use of filtered water.
The test for drainage: If you wash the test, you should be able to see water draining out of the drainage holes in less than 30 seconds. If you see water pooling on top or takes an eternity to drain, then you need better drainage.
Soil and Pots: Set Your Plant Up to Win
Regular potting soil is likely to cause the death of the aloe vera plant. I discovered this lesson the hard way when I planted the second plant, which I grew in a standard Miracle-Gro pot. It was able to hold too much moisture, and the roots started to rot.
The best soil is made from the cactus and succulent mix for potting or create yourself by mixing
- 2 parts regular potting soil
- 1 part coarse, 1 part sand (not the finest sand)
- 1 Part perlite
- A small amount of gravel for drainage
Pot selection: Choose one with drainage holes that are slightly larger than the root ball of your plant. Terracotta pots are great since they’re porous and let the excess water evaporate. Avoid decorative pots that don’t drain, as they can be a death trap for plants.
Repotting every 2-3 years or whenever you notice roots sprouting out through the drain holes. Spring is the ideal time to do this in the majority of areas of the US.
Fertilizing: Less Really Is More
It might be surprising to you that aloe vera virtually never requires fertilizer. Over-fertilizing can harm the plant, which makes it weak and stiff.
- Fertilizing schedule: Every spring, apply a balanced chemical fertilizer (10-10-10 NPK) diluted to quarter strength. This is it for the entire year.
- The Dr. Jennifer Park at Texas A&M explained the issue to me in this manner: “Aloe vera evolved in nutrient-poor desert soils. When we over-fertilize, we’re actually stressing the plant and making it vulnerable to disease.”
- Signs you’re over-fertilizing:
- Leaves become soft and flexible.
- The plant grows too quickly and becomes unstable.
- Leaves lose their blue-green hue.
Harvesting Aloe Gel Like a Pro
This is where the fun begins of turning your garden into a pharmacy for yourself.
When to harvest When to harvest: Only when you have mature plants (at minimum two years of age) with leaves that are longer than eight inches. Younger plants require all their energy to continue growing.
How to go about it:
- Select the leaf with an exterior that’s strong and healthy
- Make use of a sharp, clean cutting blade and cut as near to its base as is possible.
- Keep the leaf in a straight position for about 10 minutes, allowing the yellow latex to drained out (this product can cause irritation to the skin)
- Rinse the leaf with cool water.
- Cut the edges that are spiky using a sharp knife
- Cut the leaf lengthwise, just like you’re filleting an entire fish
- Scoop the gel clear by using the help of a spoon
Storage: Gel that is fresh will keep at room temperature for approximately a week, stored in a sealed airtight container. For a longer period of storage, you can put your gel into an ice cube tray in ideal portions to be used in the future.
Safety precaution Be sure to test aloe gel using a small area of skin before you apply it to your entire body. Allergies are not common (less than 1 percent of the population); however, it is better to be safe than not knowing.
Growing Your Collection
One of the great things about aloe vera’s generosity is how its generosity is. The mature plants often make “”pups”—baby plants that develop at the base of the parent plant.
When should you separate the pups? You should wait until they’re half the size of the parent plant and possess the same root system.
How do you separate them?
- Remove the entire plant out of the pot.
- Use a gentle brush so that you can see the root system.
- Find out where the pup connects to the mother plant.
- Make use of a sharp, clean knife to slice the connecting root
- Dry both cuts for a period of 24-48 hours in order to prevent the onset of
- Place the puppy in its own pot, with drainage-friendly soil
If it is done properly, it can be used for about 90 percent of the time, which makes it among the top reliable methods to reproduce any plant that you have in your house.
When Things Go Wrong
While aloe vera is gentle, there are problems that can occur. Here are the issues I’ve encountered and the steps to deal with them:
Black or brown leaves Most often due to overwatering or poor drainage. Stop watering right away, enhance drainage, and eliminate affected leaves. Water only when the soil is dry to the touch.
Soft, mushy foliage: Root rot can result from excessive water. Get the plant out of its pot, trim away the rotten roots, then put it back into fresh dry soil. Recovery can take up to 4-6 weeks if you take care of it.
Growth that is stretched or pale There is not enough light. Change to a brighter area slowly. This is particularly common in northern states in winter.
Leaves of orange or red Most of the time, too much direct sunlight. Switch to indirect, bright light. The reddish hue is normal and is a sign of good health.
Looking Ahead
The world of aloe vera is constantly growing. Companies such as Click & Grow now make automated growing systems that keep track of the level of light and soil moisture, ideal for those who are looking for reliable plant care.
Breeders are creating smaller varieties designed specifically for indoor cultivation, such as small varieties that reach 6 inches in height. As more Americans are focusing on sustainability gardening at home, aloe is a viable alternative to purchasing commercial items that are packaged in plastic and preservatives.
Research conducted at American universities is continuing to explore possibilities for new applications of aloe vera. This includes possibilities for diabetes-related applications and inflammatory diseases. The research is driving more interest in the cultivation of aloe vera at home.
Your Step-by-Step Action Plan
Are you ready to begin? Here’s what you need to do:
Week 1 – Setup:
- Purchase a healthy and wholesome plants of aloe vera from a trusted nursery ($8-15)
- Make sure you have a terra-cotta pot with drainage holes
- Purchase cactus/succulent mix
- Find the ideal spot for a sunny day within your own backyard
Weeks 2-4 – Establishment:
- Then, water once, thoroughly, and then wait for the soil to dry completely
- Be aware of any signs of stress.
- Begin to observe the growth patterns of your plant
Months 2-3 – Routine:
- Set up a watering plan that is based on the conditions of your home.
- Begin harvesting your first crops when leaves have reached 8+ inches
- Start looking for pups
Ongoing care:
- Make sure to check for repotting requirements every spring
- Change the watering schedule to match seasons.
- Propagate pups when they appear
Budget breakdown:
- Initial plant Starter plant
- Pot and soil Pot and soil: $10-20
- Annual expenses: less than $5
- Total first-year investment: $25-40
- Estimated annual savings: $50 to $150
The Bottom Line
Aloe vera isn’t just a flower; it’s an investment in the health of your family that keeps paying dividends. If you’re struggling with burning skin in the kitchen, dry skin, or burns or just want satisfaction from growing something that can be useful, aloe will help you in ways that few other plants in the house can.
All the way from Jennifer in Portland to Mike from Sarasota and families from Detroit Aloe vera offers practical benefits, connections to the community, and a growing sense of confidence to all kinds of backgrounds. It’s not necessary to have to be a gardener—you only need to be eager to get started.
The ideal timing to grow aloe vera was last week; however, the second-best time to plant is right now. Future self-success will be grateful for you for it.