
Shipping Container Home Designs You Can Actually Afford
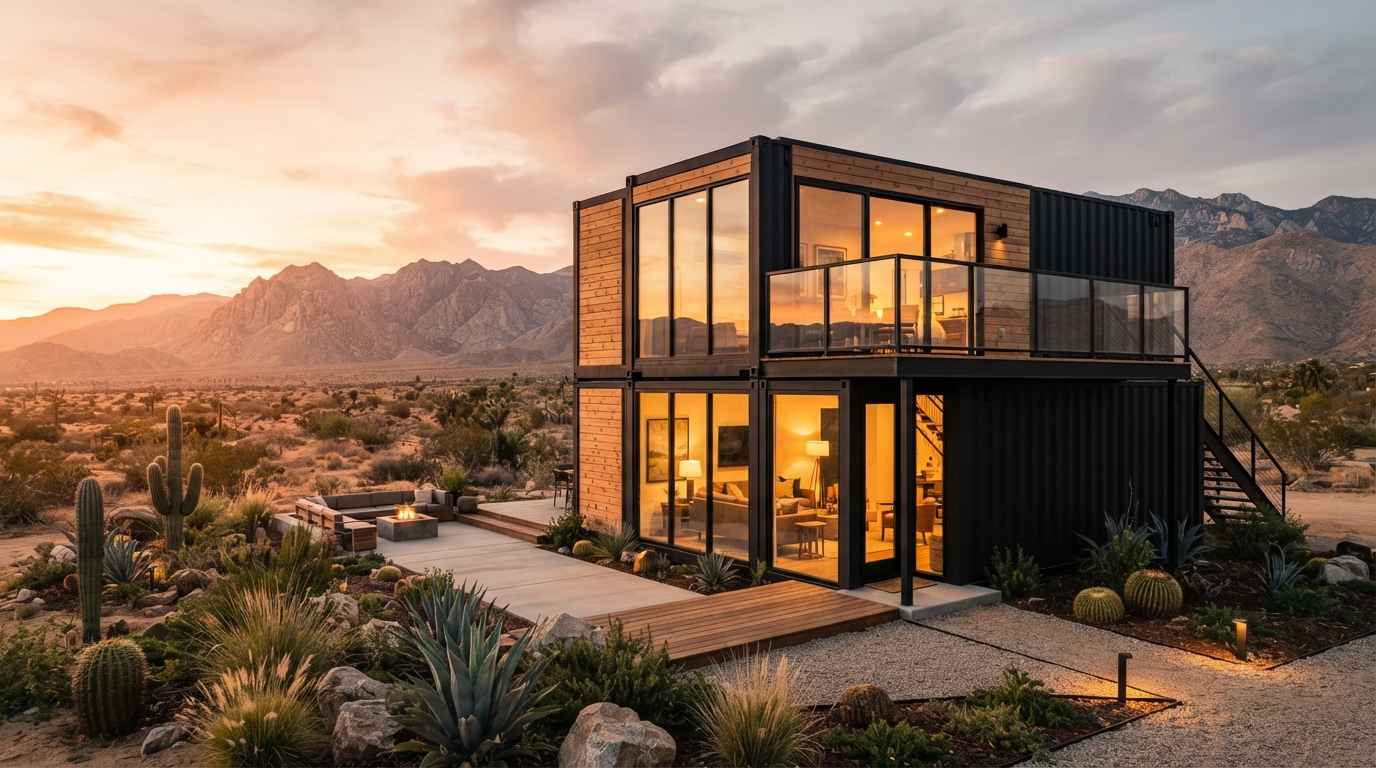

I’ve been watching the shipping container home movement for about five years now, and honestly? It’s gone from “weird experimental thing” to “wait, this might actually be the smartest housing decision you could make.”
The transformation is wild.
What started as a few architects playing around with used cargo containers has turned into a full-blown housing revolution. And I get it — when I first saw a container home, I thought it looked cold and industrial. Then I stepped inside one in Austin last year.
The game changed.
These aren’t just metal boxes anymore. The designs I’m about to show you range from cozy single-container studios that cost less than a new car, to multi-container mansions that rival anything in Architectural Digest. Some took three months to build. Others cost 60% less than traditional construction.
But here’s what really got me: every single person I talked to who lives in one said the same thing — “I wish I’d done this sooner.”
Let’s break down twelve designs that are actually getting built right now, not just pretty renders that’ll never see daylight.
Learn more:Salon Room Ideas That’ll Make You Want to Start Your Own
1. The Single 40-Footer Studio (The Gateway Design)

This is where most people start, and for good reason.
One 40-foot shipping container. That’s it. Sounds limiting until you see what designers are doing with 320 square feet. I visited one in Portland that had a full kitchen, bathroom with a surprisingly spacious shower, sleeping loft, and a living area that didn’t feel cramped at all.
The owner, Sarah, bought the container for $3,500. Total build-out cost her $28,000, and that included hiring professionals for the electrical and plumbing. She did the insulation and interior finishing herself over about four months of weekends.
What makes this design work:
- One container means simpler permitting (in most places)
- You can often skip a full foundation — concrete piers work
- The structure is already there — you’re just finishing the inside
- Mistakes are cheaper to fix
The biggest trick? Don’t try to make it feel like a regular house. Lean into the narrow shape. Use the length. Sarah put her kitchen and bathroom at opposite ends, which created natural separation without needing walls.
2. The Double-Wide (Two Containers Side-by-Side)

Take two 40-foot containers, remove one long side from each, connect them, and suddenly you’ve got 640 square feet that actually feels spacious.
I’m not kidding about the spacious part. The first time I walked into a double-wide container home in New Mexico, my immediate thought was “oh, this is just a regular house.” Which is exactly the point for a lot of people who want container home benefits without the tiny-home compromises.
The couple who built it spent about $65,000 total. That included the two containers ($7,000), foundation ($8,500), all materials, and contractor fees for the structural work. They got a two-bedroom, one-bath home with a proper living room.
The critical detail everyone misses:
When you cut out those connecting walls, you need serious structural reinforcement. The containers are strong because they’re complete boxes. Start removing sides and you need steel beams to maintain integrity. Budget for this — it’s not optional.
3. The Stacked Two-Story

This design looks impressive as hell, which is half the point.
Two containers stacked perpendicular to each other — so they form a cross or “T” shape when you look from above. The lower container usually houses the main living space, kitchen, and bathroom. Upper container becomes the primary bedroom or home office.
I’ve seen this done two ways. Some builders cantilever the upper container so it hangs over the lower one. Creates this dramatic overhang that doubles as a covered patio. Others stack them offset by just a few feet, which looks modern but is structurally simpler.
The home I toured in Colorado took this approach, and the guy built it for $72,000. The cantilevered upper container created a covered outdoor space he uses probably eight months out of the year. In a state where outdoor living matters, that extra “room” justifies the complexity.
What you’re signing up for:
You need a crane. That’s an extra $3,000–5,000 depending on your location. You also need an engineer to sign off on the structural calculations. But the visual impact? Nothing else compares at this price point.
4. The L-Shape Configuration

Three containers arranged in an “L” creates natural room separation without building extra walls.
The best version I’ve seen used two 40-foot containers for the long part of the L (living room, kitchen, dining) and one 20-foot container perpendicular for the bedroom wing. This automatically creates a private bedroom area that feels separate from the main living space.
Total living space: about 800 square feet. Total cost for the build in Tennessee: $89,000, and that’s a finished, move-in-ready home.
The hidden advantage:
That interior corner where the containers meet? Perfect spot for a courtyard or protected patio. Instant outdoor room that’s shielded from wind and feels private even if you’re in a neighborhood.
5. The Tiny Container Cabin (Single 20-Footer)

Not everyone needs or wants 320 square feet.
A single 20-foot container gives you 160 square feet, which sounds impossibly small until you remember that’s basically a decent hotel room. And some of the most clever designs I’ve seen are in this size.
There’s a 20-footer in the North Carolina mountains that cost $18,000 total to build. Functions as a weekend cabin. Has a Murphy bed, tiny kitchen, composting toilet, and a shower. No, you’re not raising a family there. But for a weekend escape or a backyard office/studio? It’s perfect.
Real talk:
This only works if you embrace minimalism. You can’t bring a regular household’s worth of stuff into 160 square feet. But if you can let go of the excess, the simplicity is actually kind of freeing.
6. The Container Compound (Multiple Buildings)

Instead of connecting everything into one big structure, some people are building separate container buildings on their property.
Saw this approach on a property in Oregon — main house made from three containers, separate guest house from one container, and a workshop/storage building from another. All on five acres.
What I loved about this: each building went up separately over three years as the budget allowed. They didn’t have to take on one massive project. First year, main house. Second year, guest container. Third year, workshop.
Spreading the cost over time meant they could pay cash for everything. No construction loan at all. Final total: around $140,000 for three separate buildings and roughly 1,200 square feet of finished living space.
7. The Glass-Front Modern Design

This is the Instagram darling of container homes, and honestly, it earns the attention.
Take a 40-foot container. Cut out the entire front side — like, completely remove it. Replace it with floor-to-ceiling glass doors (usually the folding kind that opens completely).
The result looks expensive. Feels expensive. Doesn’t actually have to be expensive.
The build I toured in Arizona cost $52,000. The glass door system was the single biggest expense at $4,800, but it turned a dark metal box into a light-filled space that rivals any modern tiny home. The owner positioned it to face his best view — desert landscape with mountains beyond.
The catch:
Your heating and cooling costs depend entirely on that glass. In moderate climates, fine. In extreme heat or cold, you’ll need quality glass and excellent insulation, or you’re burning money on utilities.
8. The Partially Buried “Bunker” Design

Sounds weird. Looks cool. Works incredibly well in the right setting.
The concept: excavate your site, place one or more containers partially underground, backfill around them, and you’ve created an earth-sheltered home.
Benefits are real — your heating and cooling costs drop by something like 50-70% because the earth naturally insulates. I visited one in rural Missouri where the couple literally doesn’t run heat until it’s below 20°F outside. The earth maintains the interior at around 55-60°F year-round with zero energy input.
They built a two-container version for $68,000, and their highest electric bill is about $45 a month.
What you need to know:
Waterproofing is everything. You’re creating a basement, essentially. That means proper drainage, waterproof coatings on the exterior, and a plan for handling groundwater. Cut corners here and you’re living in a damp metal box. Do it right and you’ve got the most energy-efficient home on your block.
9. The Pool House Container

Not a primary residence, but I’ve seen enough of these now that it deserves mention.
A single 20-foot container converted into a pool house, changing room, or backyard entertainment space runs about $15,000-25,000 depending on how fancy you get.
The setup I liked best was in Florida — 20-foot container with one long side completely open (roll-up door), creating a covered outdoor bar and lounge area facing the pool. Mini-fridge, small sink, storage for pool supplies, and a bathroom.
Way cheaper than building a traditional pool house, and it went up in about six weeks from delivery to finished.
Learn more:Aesthetic Lily Flower Wallpapers and Designs That Transform Into a Garden
10. The Two-Story Family Home (4+ Containers)

This is where container homes stop being “alternative housing” and start competing directly with traditional construction.
Four to six containers, two stories, 1,500+ square feet, three bedrooms, two baths — everything a family needs. The designs I’ve seen in this category look like regular houses from the outside. You’d never know they’re containers unless someone told you.
Best example: a home in Texas using six 40-foot containers. Total cost: $185,000 for a finished 1,800-square-foot home. Comparable traditional construction in the same area was running $285,000-320,000.
Time advantage:
The structural shell went up in three days once the containers were on site. Three days. A traditional framed house takes weeks just for framing. The time savings alone can offset the cost of the containers.
11. The Off-Grid Homestead Design

Containers pair weirdly well with off-grid living.
The tight envelope is easier to insulate well. The structure is already weatherproof. And the modular nature means you can expand as needed — start with one container while you establish your property, add more later.
The setup in rural Montana I visited used three 40-foot containers arranged in a U-shape, solar panels on the roof, rainwater collection, and a septic system. Total cost including all the off-grid systems: $95,000.
They’re living completely off-grid with roughly the same comfort level as a standard home. The only compromise? They’re more conscious about electricity usage, but that’s by choice.
12. The Rooftop Container Addition

This one’s next-level.
Instead of building on ground level, some people are putting containers on rooftops of existing buildings. Saw this in Denver on an old commercial building that got converted to mixed-use. The owner put two containers on the roof, created a two-bedroom apartment, and now rents it out.
The structural engineering gets complex — you need to verify the existing building can handle the weight. But if it can, you’re creating a living space where there was just an empty roof before.
His total cost including structural reinforcement, crane rental, and full interior buildout: $78,000. He rents it for $1,800/month. The math worked for him.
The Real Cost Breakdown (What They Don’t Tell You)
Every design I’ve mentioned has a price range, but here’s what actually goes into these numbers:
Container cost: $2,000-5,000 per used 40-foot container (less for 20-foot, more if you want “one-trip” containers in better condition)
Foundation: $3,000-15,000 depending on soil, climate, and size. Concrete piers are cheapest. A full basement is most expensive.
Cutting and framing: $5,000-25,000 for professionals to cut openings, reinforce structure, and frame windows/doors.
Insulation: $2,000-8,000. Spray foam is best but priciest. Rigid foam panels are the budget option.
Windows and doors: $3,000-12,000. Standard sizes are cheaper. Custom is where costs explode.
Utilities (electrical, plumbing, HVAC): $8,000-20,000. Can’t skip this stuff.
Interior finishing: $5,000-30,000. Your choice of materials makes this number swing wildly.
Permits and engineering: $2,000-10,000. Some areas are container-friendly. Others fight you every step.
So when someone says they built a container home for $30,000, they probably did most of the work themselves and made budget choices at every turn. The $150,000 builds usually include contractors, higher-end finishes, and complex designs.
Both are valid. Just know what you’re comparing.
What I Wish Someone Had Told Me Before I Started Researching This
The permit situation is real. Some counties embrace container homes. Others make you jump through hoops that might not even be worth it. Call your local building department before you buy a single container.
Insulation matters more than you think. Containers are metal boxes. Metal conducts heat and cold incredibly well. If you skimp on insulation, you’ll hate your life. Budget properly for this part.
Not all containers are equal. Used containers that hauled chemicals or hazardous materials? Pass. “One-trip” containers (used once for cargo, basically new) cost more but you know exactly what you’re getting. The savings on a sketchy container aren’t worth the risk.
The learning curve is real if you DIY. I talked to seven people who built their own container homes. Every single one said they’d budget 50% more time than they initially thought. Things take longer when you’re learning as you go.